Assembling a Secretlab gaming chair is easy and intuitive. Extra instructions aren’t necessary. Even so, this guide walks through the unboxing and assembly of Omega and Titan gaming chairs. Consider it a preview of what’s to come after you buy a Secretlab chair and wait for its delivery

For my last round of direct chair testing, I spent eight months using a DXRacer Racing PRO Series chair. To take my next round of testing to a higher level, I arranged a 3-pack of Secretlab gaming chairs. My picks:
- Titan Stealth: the base design of Secretlab’s flagship model.
- Titan Cyberpunk: the most striking SL specialty design, in my opinion.
- Omega Softweave Black: fabric gaming chair with smaller dimensions than Titan chairs. Good for testing fabric variations and Omega sizing.

Upon arrival, the first impression was how heavy Secretlab chair boxes are. The Titan package weighs 77 pounds (35 kilos); the Omega package weighs 66 pounds (30 kilos). If carrying your new Secretlab gaming chair delivery up stairs, you’ll need two people to walk it up.
Titan and Omega unboxing and assembly
Before your delivery arrives, clean your computing workstation from top-to-bottom. After that, clear out a clean floor space of around 3 meters squared to set up your chair. The cleanliness aspect will make more sense in the ‘what to expect‘ portion of this guide.

Once the box arrives, get the help of a friend to carry it to your 3×3 meter setup space. Then crack open the box. The first thing you will see is a warning: “Do not touch backrest recline lever while removing from box.” The reason for that warning will become clear a few steps down the line.

Under the warning panels, you’ll find a step-by-step installation guide with photos. Remove the guide and set it off to the left. Keep it close and refer to it whenever you get stuck — it’s very easy to follow. Under the guide is a layer of foam. Remove the foam layer and place it to the right of the box. Under the foam, you will see the chair’s backrest.

Place the backrest on the foam padding you just placed to the right of the box. This completes the setup of your assembly workspace. Next, begin the actual assembly.
Step 1: build the chair base
After removing the backrest from the box, you’ll find another layer of foam. Place that off to the side as a space to build your chair base. Under the foam, you will see the metal chair base and a box of tools. Take both out of the box and place them onto a foam pad.

Place the base upside down on the foam. Open the box to reveal the casters, Pop each caster into the chair base. Press down until you hear a click.
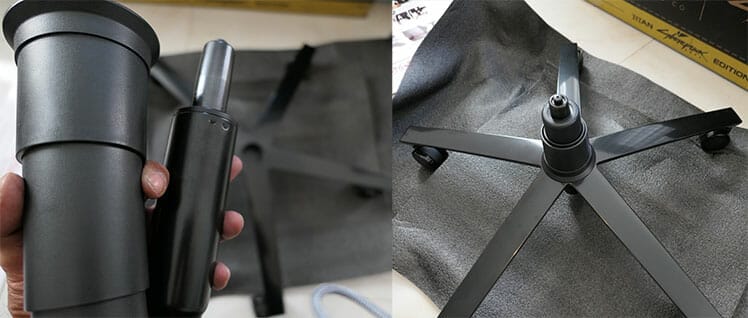
Once the casters are in place, turn the base right-side-up. Then slide in the gas lift cylinder. Over top of the cylinder, add the plastic protection rings. That completes the base. Push it aside and move on to the backrest.
Step 2: prepare the backrest
Remove the backrest from its plastic wrap. Place it on a sheet of foam. Use your fingers to remove two screws on each side of the backrest.

Drag the foam sheet (with the backrest on top) off to the side.
Step 3: prepare the seat
At this point, you should have the base of the chair and the backrest resting on foam pads beside the box. Pull the next sheet of foam out of the box and onto the floor.

Under the foam is the seat and armrests attached as a single unit. Gently pull out the unit and place it onto the foam. After that, use a pair of scissors to remove the plastic wrap. You’ll see a cardboard strip across the seat with a warning: “Do not remove this strap until the backrest has been securely installed.”
The reason for the warning becomes clear a few steps later.
Step 4: connect the seat to backrest
Connecting the backrest to the seat is the most difficult step. That’s mainly because the backrest is quite heavy.

Slide the sleeve attached to the backrest over the latch attached to the seat. If you struggle with this part, get the help of a friend. Once the backrest sleeve attaches to the seat latch, check the other side. Make sure the two parts line up.
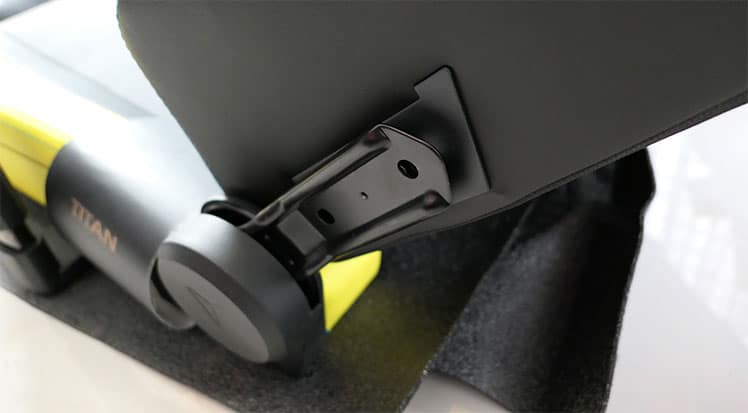
Once the latches line up, gather the four backrest screws that you removed earlier. Then pull out the included toolkit from the accessories box.

Use the large Allen Key inside the toolkit to tighten the bolts connecting the seat and backrest.

With the backrest now attached to the seat, your chair begins to take shape.
Step 5: disable the backrest lock
The cardboard warning strip over the seat reads: “Do not remove this strap until the backrest has been securely installed.” Since the backrest is now installed, you can remove the strip. Under the strip, you will find another warning pointing to a screw hole.
That one reads: “Do not remove screw until backrest has been installed.”

With the screw in place, the backrest also locks in place. That ensures no movement during shipping or assembly.

With the screw removed, the backrest becomes fully-functional.
Step 6: install multifunction tilt mechnism
At this point, the backrest, seat, and armrests are a single unit. Gently flip the entire unit upside down onto foam sheets.

Then, pull out the multifunction tilt device. Use the four screws inside the toolkit to attach the device to the base of the chair. The gas lift hole should face towards the backrest; the tilt tension knob should face towards the seat.

To complete building out the underside, pop in the control levers. When facing forward in the chair, the left level lever is the multifunction tilt device.

Use that to tilt and lock the seat at angles. The lever on the right controls the height of the seat. Check out our multifunction tilt-lock explainer guide to learn more about this feature.
Step 7: connect base to the seat bucket
For the final step, push your installed seat base into the seat hole.

Slide it in and your chair is almost ready. Get the help of a friend to turn the chair right-side up. Have your friend hold the base in place as you turn the chair over.

Take a moment to appreciate the beauty of your build.
Finishing touches and cleanup
As the final step, attach the backrest bolt covers. These attach with magnets. Push the plastic cover over the bolt holes. The magnets will pull the pieces together and snap them into place. That completes your Secretlab chair build.
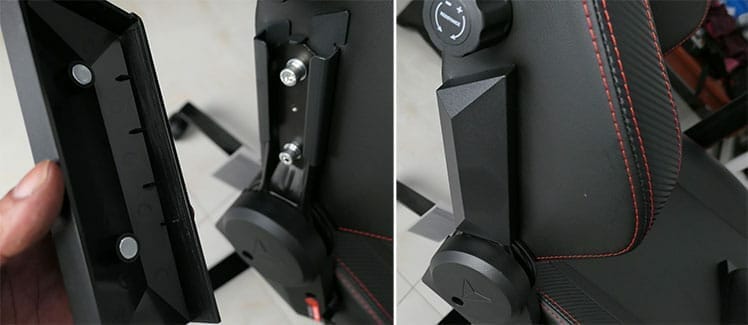
Collect all of the loose parts and foam sheets. Stuff them all back into the box. After testing your chair and confirming everything works as it should, you can get rid of the box.
What to expect after setup
As this unboxing and assembly guide shows, the attention to detail that goes into Secretlab chair packaging is exquisite. The company clearly put a lot of thought into making the unboxing a true “experience”. That serves as a fantastic appetizer for the main course: using your new chair at your computer workstation.

If you followed the introductory advice, you would have cleaned your workstation before assembling your chair. Here’s where that foresight pays off.
Rolling your new Secretlab gaming chair up to your clean workstation will likely leave you feeling stunned. The gold standard of ergonomic gaming chair seating now sits right in front of your desk. Take a moment to enjoy that.
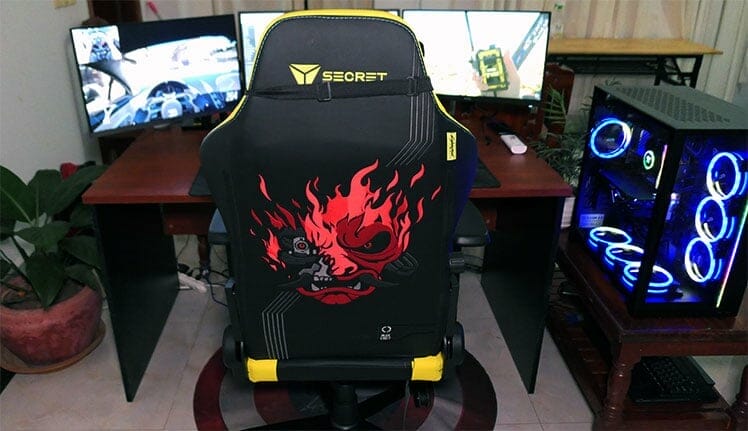
In fact, this is the perfect time to take an introductory snapshot of your new workstation. In doing so, you can also extend your chair warranty.
Extend your warranty with a social post
Post the picture of your new chair on social media. Tag Secretlab. That will extend your chair warranty from three years to five years (details). Example:

This extension warranty process is a nice touch. It gives you a reason to stop and savor the sight of your chair before using it. It’s also a good opportunity to document the start of what’s sure to be a long and enriching ergonomic relationship.
Mind-bending introduction
Testing a Secretlab chair in a showroom is a very different experience than actually using one. If you’ve never owned a gaming chair before, expect a few days of disorientation before you find your healthy sitting groove. To master effective sitting fundamentals, check out our gaming chair user guide.

Even though I’m a seasoned gaming chair user, my 3-pack of Secretlab chairs left me disoriented for around three days. Every aspect was exquisite. All three chairs were extremely comfortable out of the box. They all come with many adjustment options. It’s a lot of information to take in.
Enjoy the learning experience as you find your sweet spots. As that happens, expect increased awareness of both your sitting posture and your workstation surroundings.
Re-evaluation of workspace aesthetics
My old setup was pretty good. It was a triple-monitor setup powered by a Lenovo Legion 5 (Price not available on Amazon).
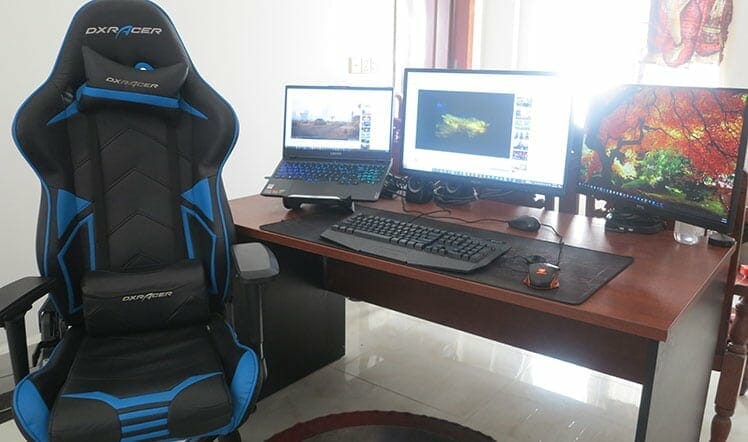
Over the past three years, I’ve only tested Secretlab chairs in showrooms. A big hesitation in testing them in-house is because I know they’re of exquisite quality. With ultra-high-end chairs, it looks funny (in my opinion) if the workstation isn’t up to scratch.
After ordering my three chairs and receiving notification of delivery, my setup really started to bother me. For one thing, my Lenovo Legion (like most laptops) runs very hot during intensive tasks. For another, a triple-monitor laptop setup is a mess of wires.
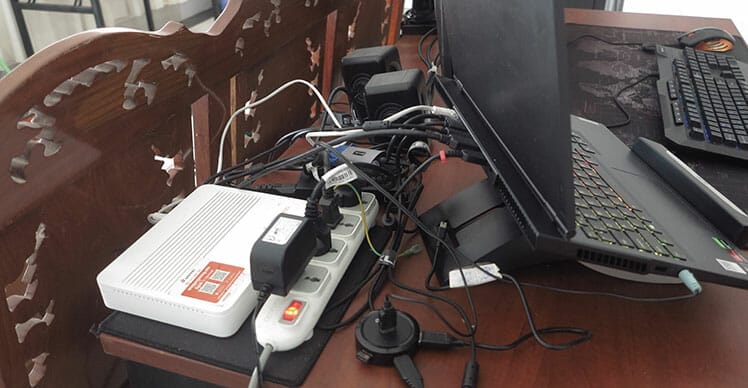
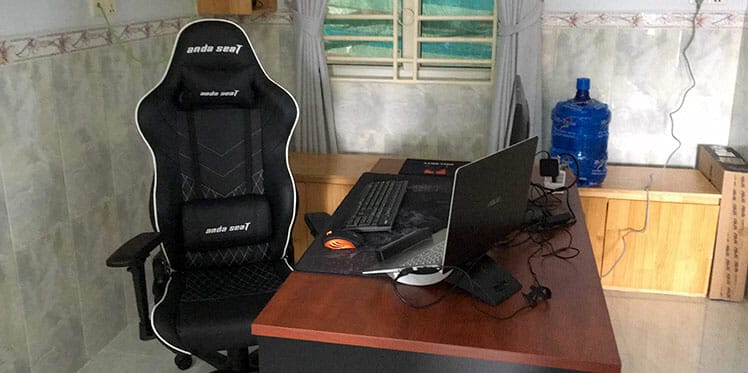
As my chair arrival loomed, cable management pushed me over the edge. I couldn’t imagine three high-end chairs blending well into such a crude setup. Therefore, I decided to pull the trigger on a new PC setup I had been planning for a while. Amazingly, my PC build finished just a few hours before the Secretlab chairs arrived.

Based on my experience, Secretlab chairs seem best suited to those aspiring towards, building, or maintaining a high-end computer workstation. If you don’t mind scrappy aesthetics and just want good posture support, it makes less sense to pay a premium.
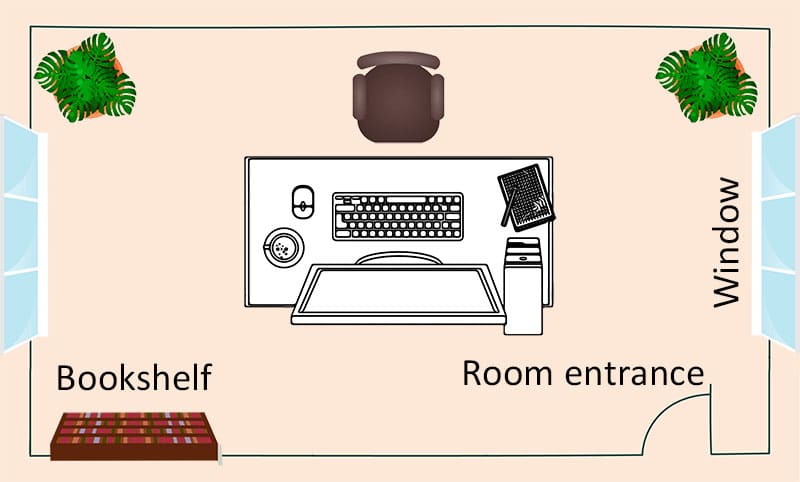
Are you ready for a mind-bending ergonomic and aesthetic adventure? If yes, buy a Secretlab chair and check out our ergonomic home workstation blueprint. That includes sizing specs, framing tips, and Feng Shui pointers (like effective positioning in a room for optimal energy flow).
In contrast, if you only need good posture support and basic comfort, browse the best gaming chairs under $200. Those support good posture with no-frills designs and rock-bottom prices.
Experimenting with chair adjustments
The Titan is a larger chair with an internal lumbar support pillow. It has a flat seat that offers plenty of leg room. In comparison, the Omega is a smaller chair. It comes with a memory foam lumbar support pillow and has ridges edges that restrict leg movement. Check out our Omega vs Titan comparison for a detailed breakdown of differences.

My previous DXRacer Racing Pro Series has similar dimensions to the Omega chair. As a result, it only took me a few hours to get used to sitting in the Omega.
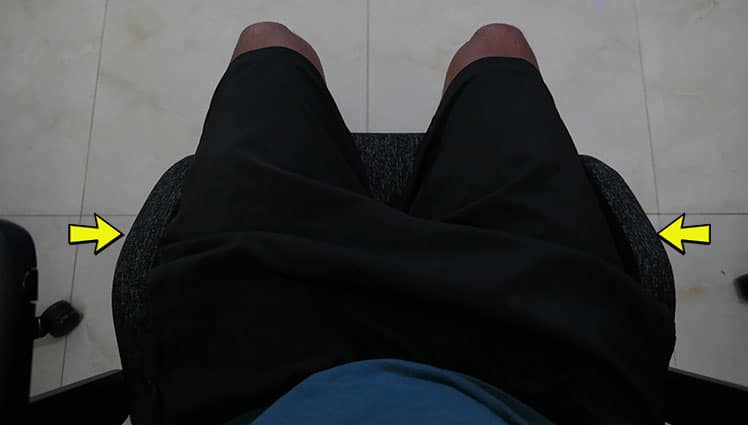
Omega chairs come with a big memory foam pillow. It doesn’t attach to the backrest — chuck it behind the seat and lean back. The memory foam will compress and fill your lumbar curve like magic. Because the pillow is so large, there’s no chance of it missing full support directly into your lower back.
In contrast to the Omega, I found the Titan harder to get used to. For one thing, while most gaming chairs have a body-hugging fit, the Titan is spacious. For another thing, the depth-adjustable internal lumbar support takes some getting used to.
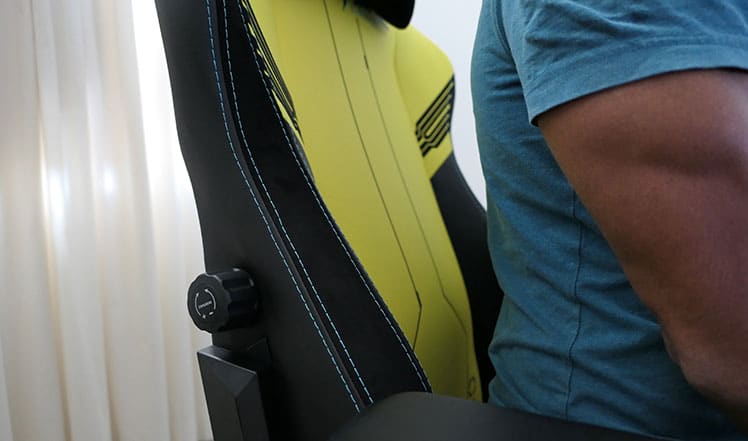
At first, I felt the internal lumbar support was too high. After photographing myself from different angles, I noticed I was slouching more within the spacious Titan dimensions. After some stretching and focus on sitting straighter, the lumbar hit the sweet spot.
As noted in our detailed Titan chair review, Secretlab recommends this chair for users between 5’9″ to 6’7″. At 5’9″ (177 cm), the lumbar just fits my lower back curve. That suggests Secretlab’s size rating for this chair is spot-on.
Finding your sweet spots
With both chairs, try these adjustments to find your optimal comfort zones:
- Adjust the height of your chair so that your feet rest flat on the floor.
- Adjust your armrests so that they sync with the height of your desk.
- Toggle the backrest recline between 90 to 120 degrees. Find an angle that you feel comfortable with.
- Adjust the neck pillow so that it fits in the curve of your neck.
- Test the rocking and tilt-lock functions (lever under the left side of the seat). Integrate what works into your usual sitting routine.
After a few days of experimenting, you should find your “sweet spots”. That should be a handful of adjustments that help you move while sitting.
For example, I like to alternate between two backrest-angles. During intense work, I angle forward to around 100 degrees. For gaming and web browsing, I angle further back to around 110 degrees.

During longer bouts of sitting, I often enable the rocking function. That lets me work my feet and calves by gently powering the rocking motion. When watching videos, I like to angle and lock the seat while reclining to around 125 degrees. For more healthy sitting tips, check out our gaming chair user guide.
Productivity, wellness, and aesthetic ascension
The point of a gaming chair is to support good posture and movement while sitting. The payoff:
A good ergonomic chair supports improved health, wellness, and computing productivity.
During my previous career as a corporate drone, my cubicle days were a haze. I worked in a stupor, focused on the screen but unaware of everything else around me. As a result, my workstation (and my sitting habits) were sloppy.

When I switched to working from home, everything changed when I bought my first DXRacer in 2018. (Check out this Youtube report of the health, wellness, and productivity benefits that followed.)
First, that chair made me aware of my terrible sitting habits. That brought improved body awareness, with more attention focused on sitting up straight.
With improved body awareness came improved spatial awareness. That made me aware of my messy desk and sloppy office habits.
Secretlab chair ascension

Expect a similar trajectory after receiving your Secretlab gaming chair. After a few days of getting used to your new chair, look forward to the following:
- Improved sitting posture: the chair will help you sit straight while supporting your spine’s natural curves. That takes the pressure off the upper body muscles. As a result, you enjoy the physical benefits of good posture, with more energy to focus on computing.
- Improved wellness: if you work full-time at a desk, your chair has a huge impact on both wellness and work performance. That is why many pro esports teams train full-time using Secretlab chairs. Away from the computer, many teams also encourage their players to have adequate rest, nutrition and sleep. The rationale: when players are healthy, rested, and comfortable, they perform better. In this context, your Secretlab chair provides a wellness foundation to power your own journey towards excellence.
- Improved workstation aesthetics: a Secretlab chair at your workstation will be too beautiful to ignore. In fact, it’s likely to make you hyper-aware of your workstation feng shui. Be warned that getting into workstation aesthetics is both rewarding and addictive. Check out Reddit forums like r/battlestations, where tens of thousands show off workstations with amazing amounts of detail and passion. When your Secretlab chair arrives, come join the party.
How to buy Secretlab chairs
Secretlab chairs are available in North America, the EU and UK, Australia, New Zealand, Singapore, and Malaysia. All locations offer three models (prices will show in your local currency):
- Titan: the flagship SL chair with spacious dimensions and an internal lumbar support system. (USD $459-$519)
- Titan XL: a super-sized version of the Titan, supporting up to 390 pounds. (USD $539-$559)
- Omega: a smaller chair supporting users between 5’3″ to 5’11”. (USD $419-$439)
Browse the Secretlab online store
Secretlab chairs are available in North America, the EU and UK, Oceania, Singapore, and Malaysia.
Conclusion
This guide was written especially for those waiting on the delivery of their new Secretlab chair. While waiting, don’t just sit there. Instead, take steps to prepare for ascension to a higher workstation level.

If you have the budget, take time to assess your workstation and brainstorm some wellness upgrades. If you don’t have the budget, focus on the health, wellness, and productivity benefits that your new chair will deliver. By using your chair correctly and putting passion into your work, you’ll have plenty of budget for upgrades soon enough.
If you’re new to Secretlab chairs, check out our technical reviews of the Secretlab Omega, Titan, or Titan XL gaming chairs.
For a comprehensive look at the entire brand collection, check out this feature:
Brand review of all Secretlab gaming chairs
About the author: Anil Ramsey is the founder and Senior Editor of ChairsFX. He started using gaming chairs in early 2017. Ever since, he’s been touting gaming chair health, wellness, and productivity benefits.


