No products in the cart.
Friday, July 12, 2024
DXRacer Racing Series chair assembly guide
When you buy something using an affiliate link in this post, ChairsFX may receive a small commission, at no additional expense to you. This has no influence on our editorial content. See our Affiliate Disclosure for details.
Reading Time: 6 mins read
Buying a pro-quality computing chair gives you superb performance from the moment you open the box. Expect thoughtful packing, clear instructions and high-quality easy-assembly parts inside. I recently picked up a DXRacer Racing Series (Pro) gaming chair. Below are build photos plus an assembly guide walkthrough. Follow the steps to assemble your own DXRacer gaming chair.
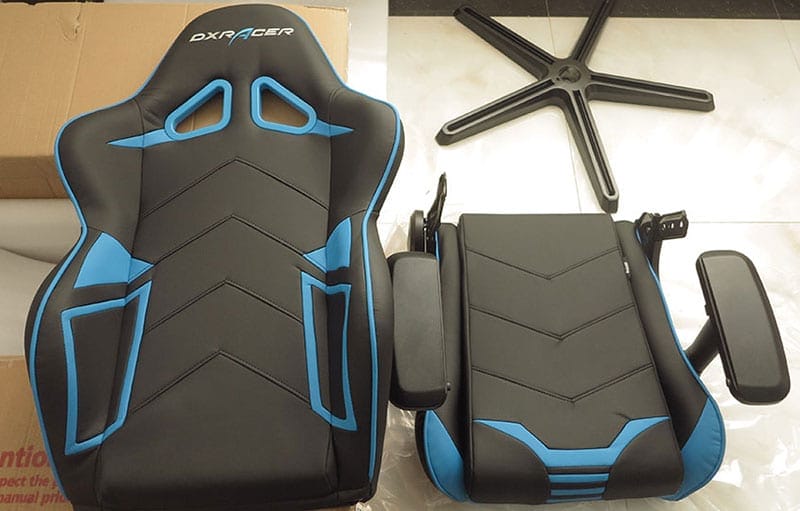
First, some context. I’ve been on a working holiday in Southeast Asia. Like many travelers around the world, I got caught in the global lockdown. So I sorted a long-stay apartment and set up a home office computer workstation. For the centerpiece, I wanted a pro-quality gaming chair. Pro-quality chairs have these features:
- Dense cold-foam seat and backrest padding.
- High-quality breathable and soft cover material.
- 4-directional armrests.
- Backrest recline plus seat angle tilt-lock.
- Legit manufacturer warranty for 2-5 years.
Best Pro-quality Computing Chairs of 2020
DXRacer Racing Series PRO
TheDXRacer Racing Series Pro comes in two versions. The consumer-class Racing Series has 3D armrests, smaller dimensions, and a conventional tilt-rocking system. The Pro version has 4D armrests, larger dimensions, and a seat angle tilt locking function. Tilt-lock is a subtle but very useful feature of pro-caliber PC gaming chairs.

There were two reasons I chose a DXRacer Racing Series Pro. First, it was the best pro-quality chair available for fast delivery in my area. Second, I wanted to test out DXRacer’s version of the seat-angle tilt-lock. That’s a very cool feature worth paying a premium for.
To learn more about the DXRacer Racing Series Pro and consumer models, check out our Racing Series review:
DXRacer chair assembly guide
All DXRacer gaming chairs are easy for one person to put together in less than 20 minutes. An assembly manual comes inside the box. Also in the box are two Allen keys and two screws — most screws are already attached to the chair. That makes the assembly process very intuitive.
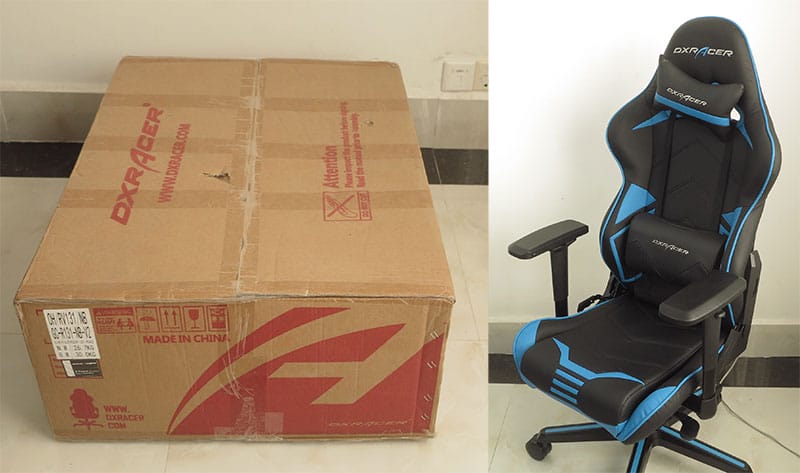
If you need the instruction manual, download a copy:
DXRacer Racing Series Assembly Manual (PDF)
Step 1: unpack the parts
Once you open the box, pull away a layer of protective foam to reveal the parts. The backrest sits on top of the seat, which already has its armrests attached.

Lay the protective foam on the floor. Unwrap the seat and backrest and rest them on the foam.
Step 2: attach seat to backrest
Take a moment to marvel at how beautiful the seat and backrest look. As you do, you will notice the first assembly step. That is to attach the seat to the backrest.
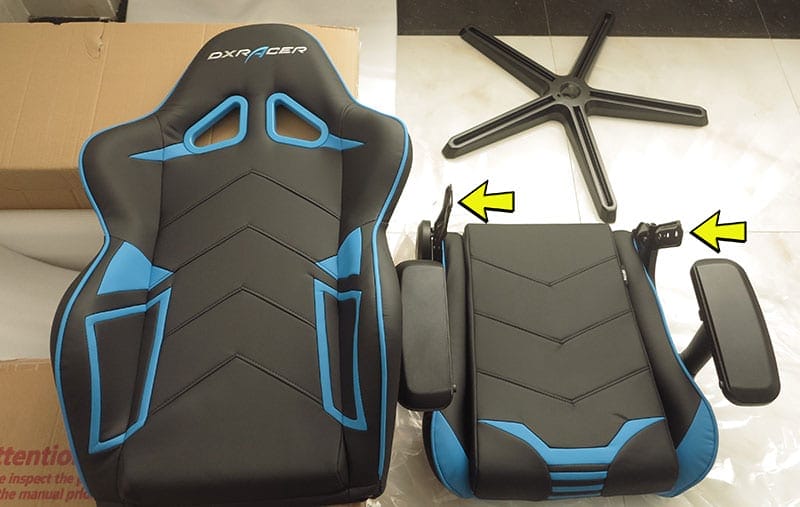
Here’s how DXRacer illustrates the process:
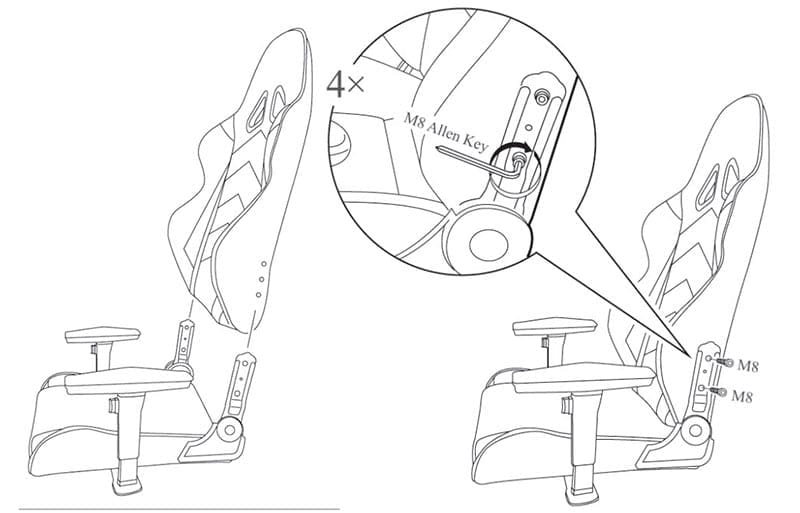
Step 3: prepare other parts
Pull the rest of the parts out of the box. It was at this point I got confused, so I cracked open the manual for the first time.

Step 4: bolt tilt mechanism to seat
Once you have the backrest bolted to the seat, flip the chair over onto the protective foam. Refer to the manual if needed. Or else use our explainer image:
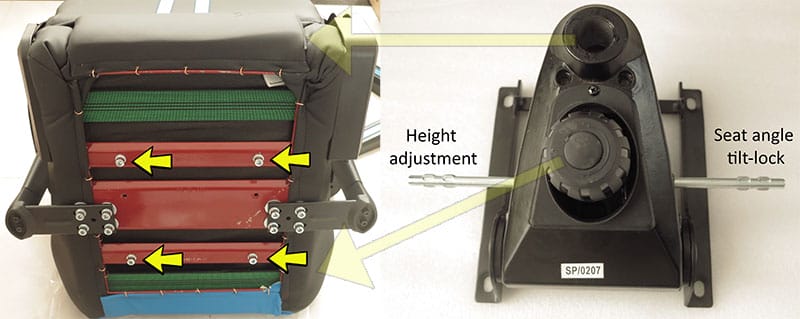
The only thing you can do wrong here is to attach the tilt mechanism in the wrong direction. The tilt-tension knob should point towards the front of the chair. The hole for the gas lift should point to the rear.
The bolts are already attached to the bottom of the chair. Take another moment to marvel at the polished steel and soft faux leather. The build is gorgeous!
Once your heart stops tingling with delight, unscrew the bolts. Then attach the tilt mechanism and replace the bolts.
Step 5: build the base
Building the base is easy.
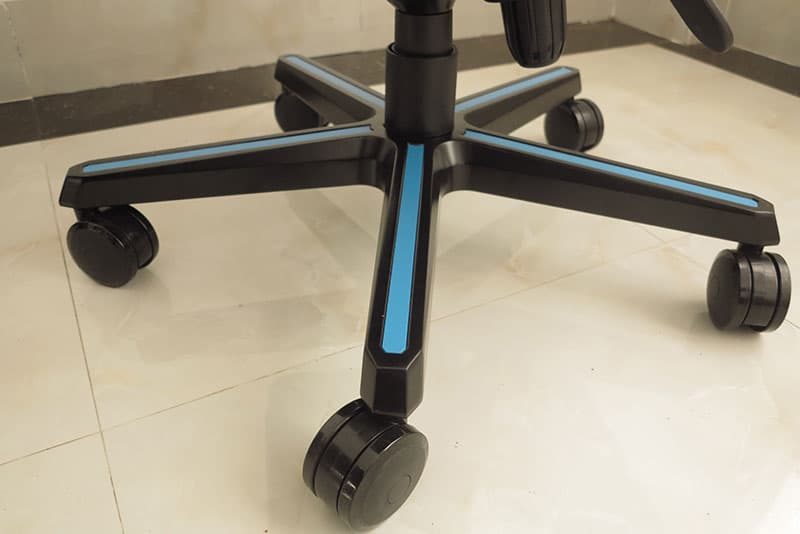
- Pop in the caster wheels.
- Push in the colored strips.
- Pop the gas lift into the hole in the center.
- Stick the plastic lift protector over the gas lift.
Step 6: put the chair onto the gas lift
This is the hardest part of the operation. First, hold up the seat and backrest. Then slowly lower the tilt mechanism hole over the gas lift.
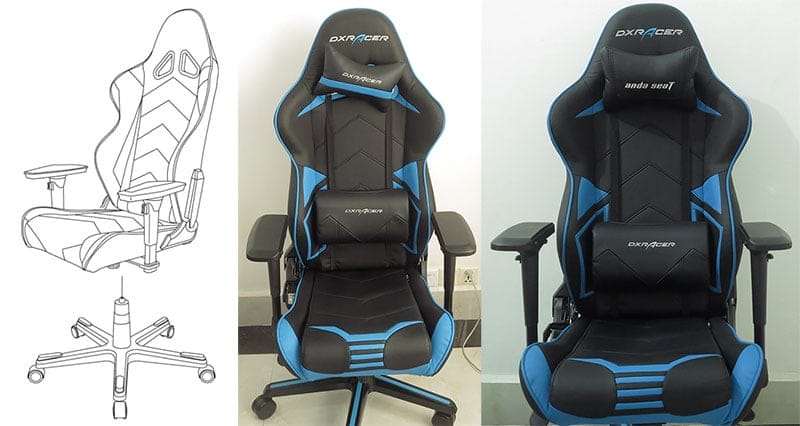
One person can manage this with a bit of muscle power. Small people under 150 pounds might need a hand from someone else.
The final step is to add the support pillows. I found the DXRacer pillow too small to support my neck. Luckily I had a spare pillow from Anda Seat with larger dimensions. That worked perfectly, giving me crisp and effective support for both my lower back and upper body.
Benefits of paying more for a gaming chair
We’ve already covered this topic in great detail. Check out our Cheap Vs. Expensive Gaming Chairs feature for a full explanation. The gist is that expensive chairs have better padding, cover materials, and adjustable features. Those provide better support — and benefits — for full-time users.
Right now, I work online for around 10 hours every day. If I bought a cheap chair for less than $200, it would have done the job with decent comfort and back support. Instead, I paid around $150 more for a DXRacer Racing Series Pro.
Higher-quality build materials
For the extra money, I get a few things. First, like with most pro chairs, my DXRacer Racing Series has padded 4D armrests. Also like pro chairs, it has luxurious padding and leather. You can see the quality of this build:
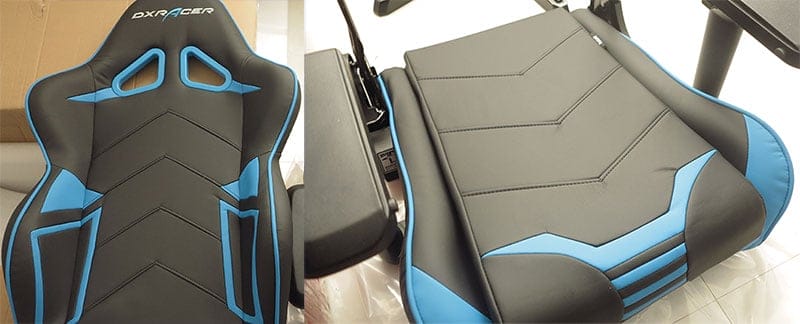
Multifunction mechanism tilt-lock
Another feature exclusive to pro-quality chairs is a seat angle tilt-lock. On cheaper gaming chairs, you can adjust the angle of the backrest. On pro chairs, you can also adjust the angle of the seat and lock it into place.
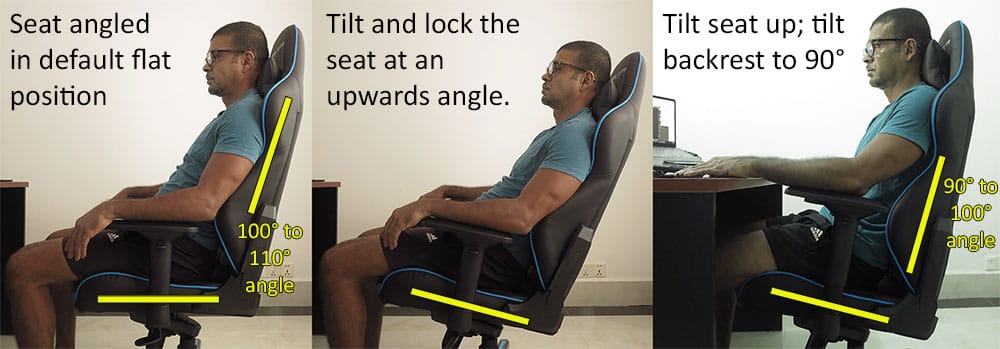
Having a tilt-lock mechanism gives you more options. For example, I tend to lean forward while doing design work but prefer leaning back when doing online research.
When doing passive online research, I angle the seat up and put the recline back a few degrees. When leaning forward for active design work, I angle the seat up and set the backrest recline to around 95° to 100°. That keeps back support intact even when leaning forward.
These are just some examples of how seat-angle tilt lock can bring more versatility to your sitting strategies. If you buy a chair with tilt-lock, take a few days to play around with the settings. Find what works for you, then include those into your daily working habits.
Conclusion
Most professional-quality PC gaming chairs are easy to assemble. Open the box, take out the parts and attach the seat to the backrest. Then bolt the tilt mechanism to the seat. After that, build the base and attach it to the seat.
Do you need an office chair to work from home with? Consider three options:
- Buy a cheap office chair: save money at the expense of your health and productivity.
- Get a cheap PC gaming chair: get decent comfort and back support but limited features.
- Buy a pro-quality PC gaming chair: enjoy the best features, comfort, and quality.
Let’s imagine three months from now, the global lockdown ends. Even if I only get three months of use from this chair, it will be worth it. How much would three months of optimal working performance help your career? How much would three months of slouching, lethargy and back pain hinder it?

Do the math in your head. If a high-quality chair seems like a good investment, check out the world’s best models:
Anil Ramsey
I'm the ChairsFX founder and Chief Editor. I'm a member of the OSHA Education Center Association (OECA), with an OSHA Ergonomics Certification. Beyond these credentials, I've been hands-on testing the world's finest ergonomic desk chairs since 2018. Learn more about me and this website on the About Us page.
Gaming chair trends, reviews, advice.


