The DXRacer Master is the world’s first modular gaming chair. That means you can stack extra functionality onto your chair. The base Master chair doesn’t ship with modules, but still ships with surprises. This article explains how to assemble a DXRacer Master. It also reveals a hidden feature that lets you ‘hack’ your chair to ensure a perfect fit.
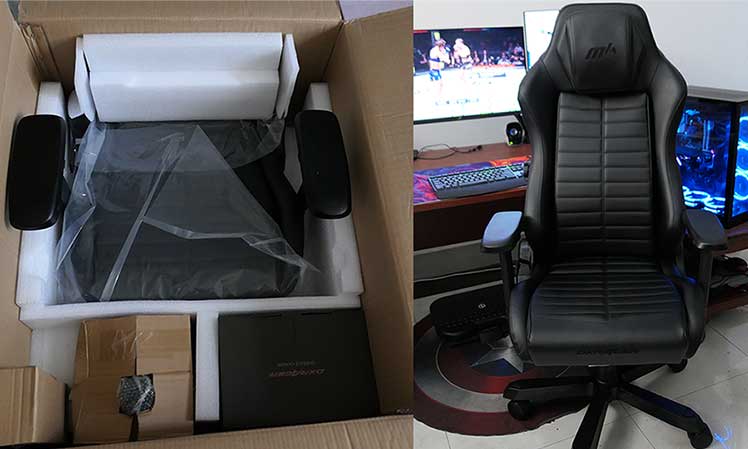
DXRacer is the original gaming chair brand and still one of the best. The 2021 DXRacer collection has several fresh releases with innovative new features.
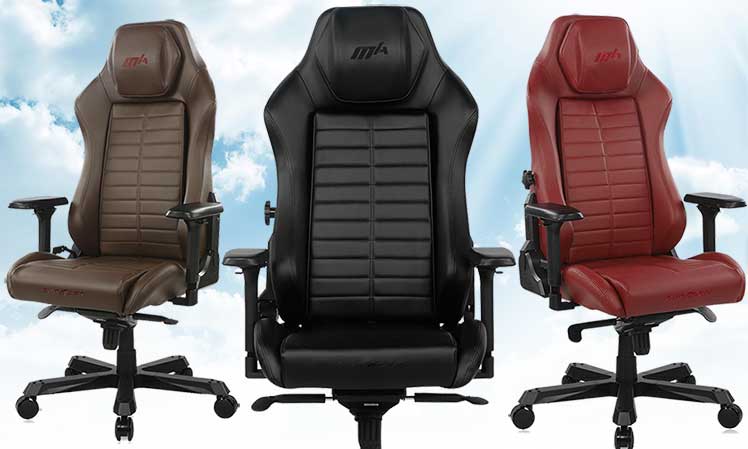
The DXRacer Master Series is the flagship of the new collection. To learn more about its specs, check out this DXRacer Master Series Gaming Chair Review.
The DXRacer Master is also available on Amazon for Price not available. At present, extendable modules are only .
Master Chair Assembly Overview
All DXRacer gaming chairs ship in heavy boxes that are easy to unpack and assemble. The Master chair’s package is a hefty 70 pounds – you’ll need two people to carry it upstairs. Assembly is a 5-step process:
- Assemble base: attach wheels, add gas lift.
- Connect seat to backrest: fasten four bolts using a provided tool.
- Install tilt mechanism: fasten under the seat with four bolts.
- Attach chair to the base: slide the gas lift into the tilt mechanism hole.
- Add plastic covers: affix magnetic plastic covers to the base and sides of the chair.
Once your chair is set up, the first thing you’ll want to try is the integrated lumbar support. Turn the dial and increase the depth to the maximum setting. Then sit down.
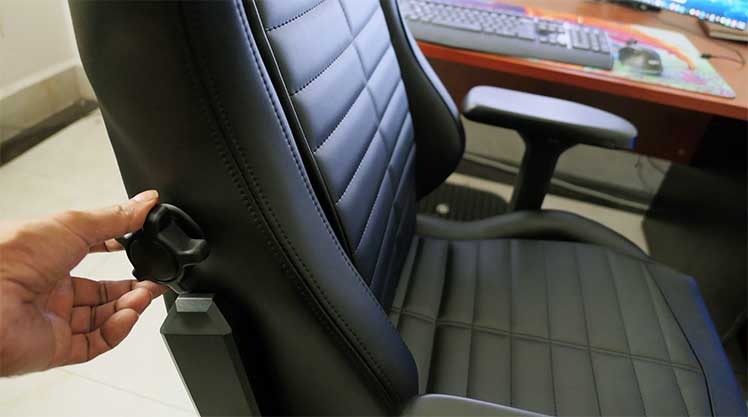
The curve should fit the absolute small of your back. In my case (I stand 5’9″ of 177cm), it felt around an inch too high. Luckily, there’s a secret hack available to adjust the height of the support.
The hack isn’t listed in the DXRacer assembly manual. It’s also not mentioned on the DXRacer website. A DXRacer marketing rep mentioned it when I asked about height adjustability.
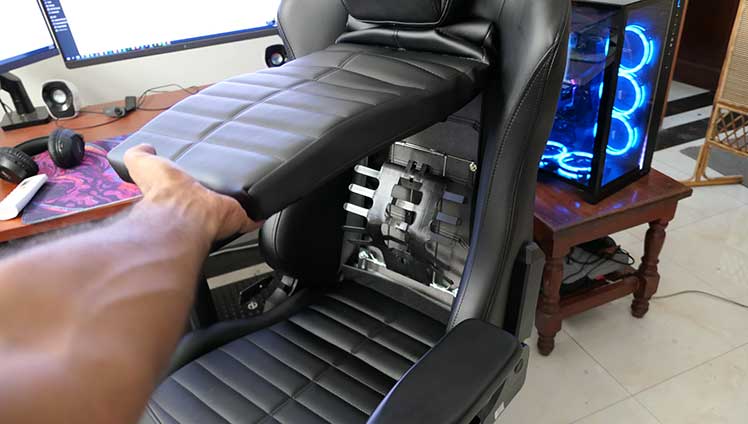
You read it here first. If you want to adjust the height of your integrated lumbar, pop the hood, then grab a wrench and Allen key. The solution exists inside that chamber.
DXRacer Master Assembly Steps
Assembling a DXRacer Master chair will take one person around 20 minutes. When you open the box, the first thing you’ll see is the backrest.
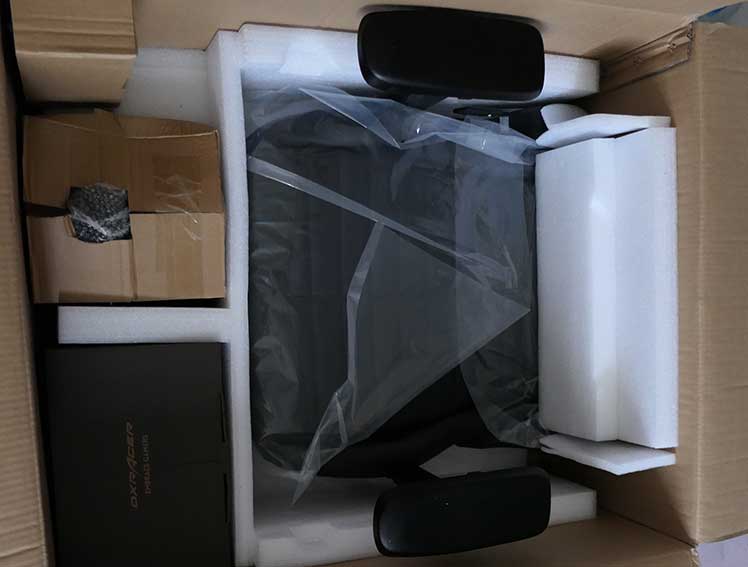
When you remove the backrest, you’ll find the chair’s base, seat, parts, tools, and assembly manual. Per the manual, there are five assembly steps, summarized below:
1. Assemble the Base
The first step is to attach the caster wheels to the base. When you first take out the wheels, you might notice that they’re huge! Here’s how the DXRacer Master caster compares to a Secretlab Titan one:
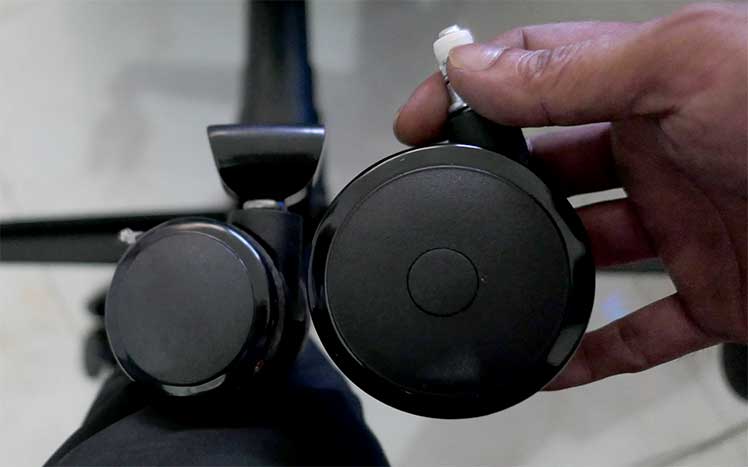
Press each caster into the base. Make sure each goes down all the way. Then flip the base over. After that, insert the plastic sheath into the base. Finally, slide in the gas lift.
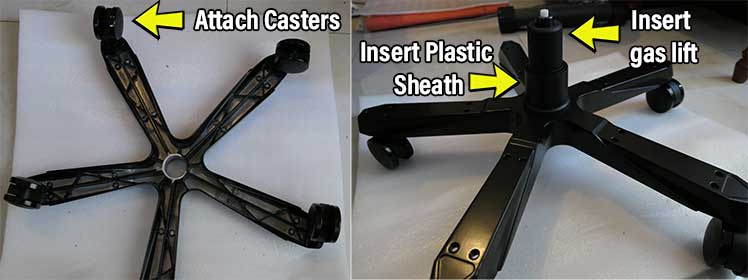
The completes the base assembly. Slide it aside and proceed to the next step.
2. Attach Seat to Backrest
The seat and armrests come as a pre-assembled unit. On each side of the seat are metal braces with two bolts attached to each side. Remove the bolts.
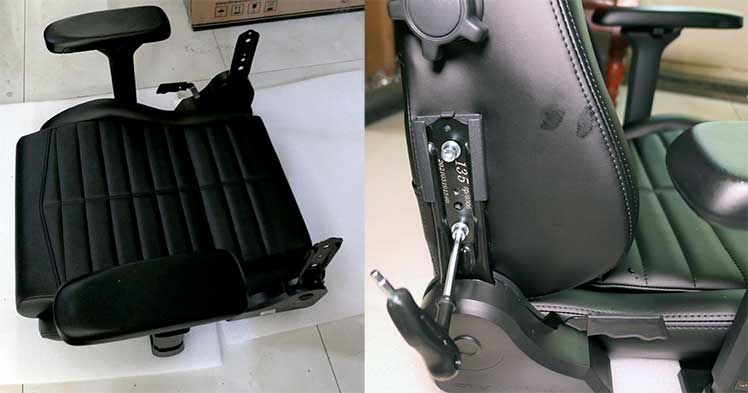
Then slide the backrest braces into the seat ones. Fasten with two bolts on each side. This is a simple process that should only take a few minutes.
2. Install Tilt Mechnism
Once the seat and backrest are attached, flip over the unit to expose the underside. Remove four bolts forming a square in the center of the seat.
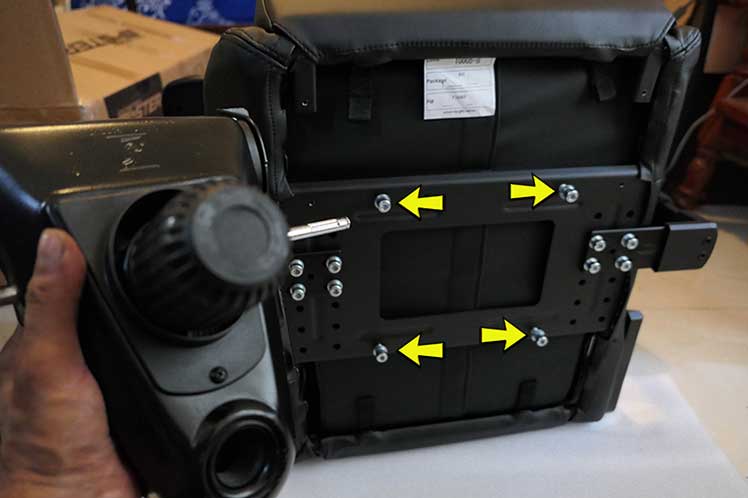
Then attach the multifunction tilt unit. The plastic tension dial should align to the front of the seat. The gas lift hole should align to the rear. Once in place, attach using the four bolts.
3. Attach Base To Tilt Mechanism
The last major assembly step is to connect the base to the seat bucket. It’s possible for one person to do this, but easier for two.
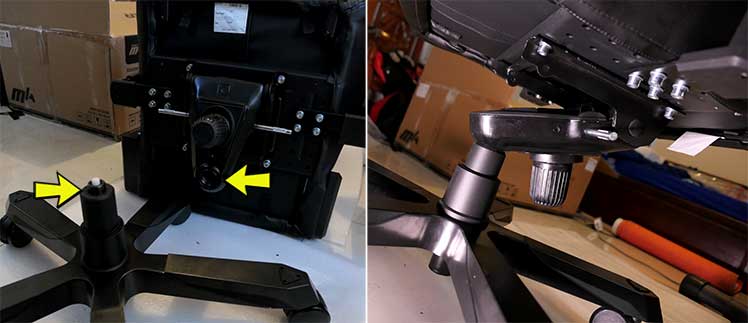
The first person should hold the seat bucket over the base. The second person should guide the gas lift into the tilt mechanism. Once aligned, simply lower the seat bucket until it fits flush.
4. Add Plastic Covers
The final step is to add some finishing touches. Attach plastic covers on the side of the chair, and also on the base.
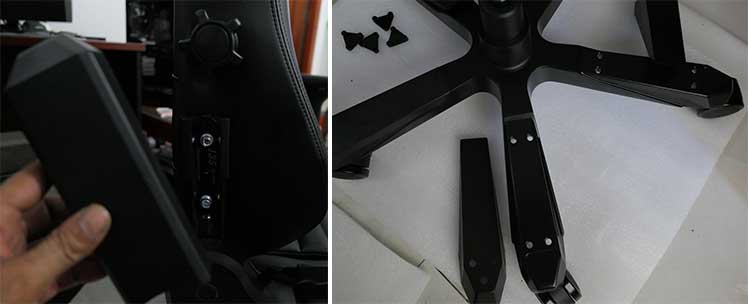
There are also a pair of tilt levers. Slide those in to toggle the chair’s height or tilt functions.
Bonus Hack: Adjust Lumbar Support Height
Once your chair is assembled, the first thing you’ll want to try out is the adjustable lumbar support. As you turn the dial, the depth extends noticeably.
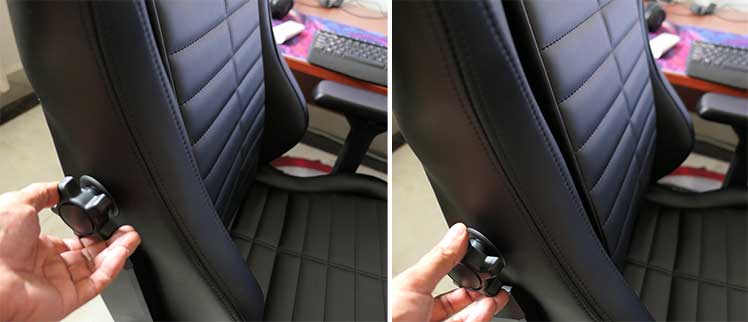
Because it extends so deeply, you can really feel it pressing into your back. Ideally, it should fit dead center in your lower back curve.
If it doesn’t, there’s a built-in solution. DXRacer doesn’t promote it. It’s not mentioned in the DXRacer Master assembly manual either.
That’s likely because doing it wrong might ruin your chair. Rather than deal with panicked customers who broke their chairs, it makes sense not to promote it.
Even so, I stand 5’9″ and found the lumbar a bit high for my liking. So I decided to take the risk and adjust it. In hindsight, it’s easy, effective, and worth it.
Tools: DXRacer includes chair assembly tools, but none to adjust the lumbar height. You’ll need a size 13 wrench and an Allen key.
1. Open The Backrest
The backrest is a thick layer of sponge attached with velcro. Pull up from the bottom, lifting the unit like you would a car hood.
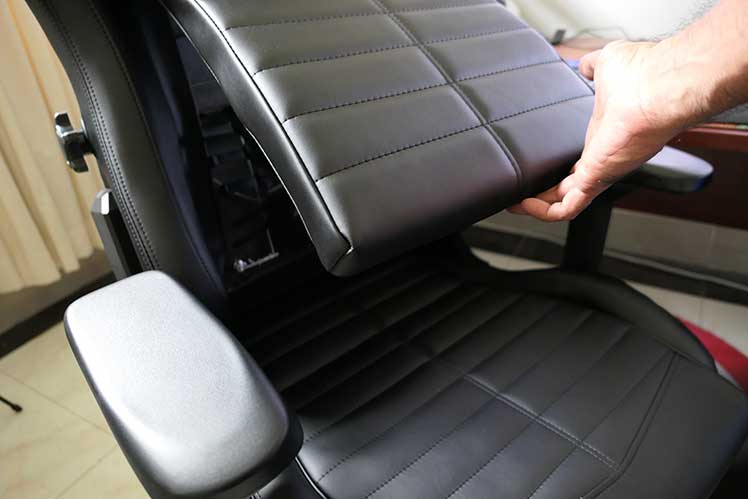
Once lifted, unclasp the velcro straps at the top end. Then, you can remove the backrest completely. That exposes the innards.
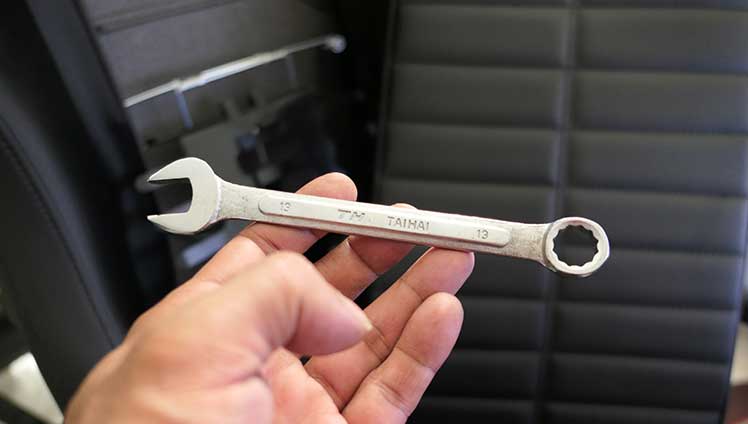
To work on the innards, you’ll need a 13″ wrench and also an Allen key.
2. Loosen bolts
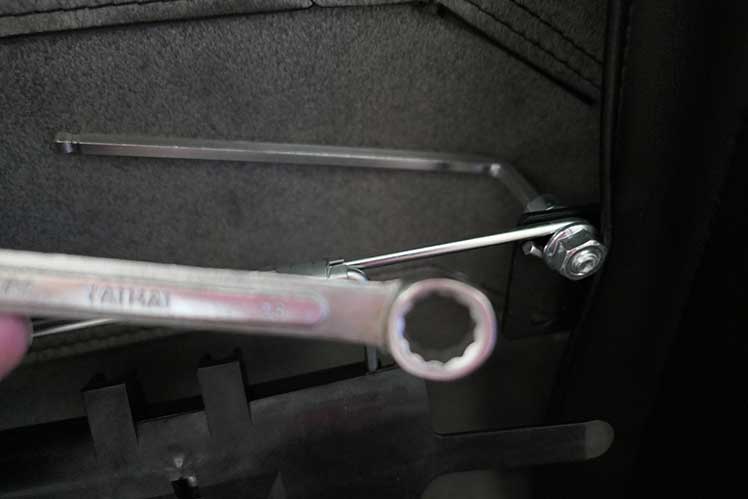
Loosening the bolts is cumbersome, but not difficult. You need a 13″ wrench to loosen from the front, and an Allen key to brace from the back.
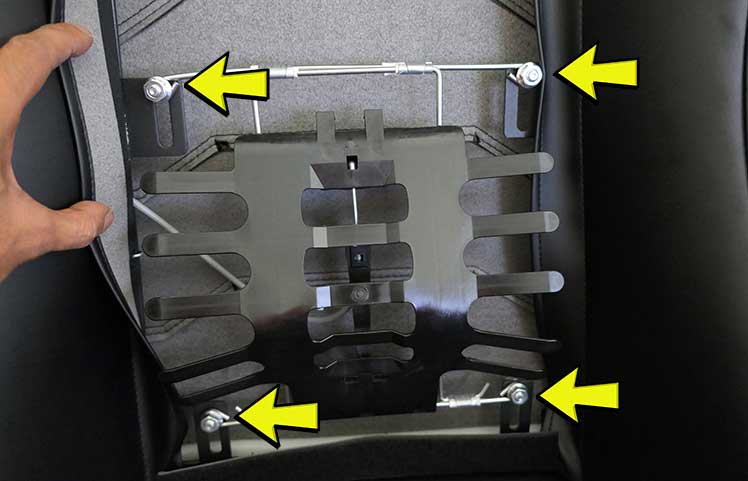
Fiddle around with an Allen key until it fits in from the rear. Then loosen the nut at the front using the wrench.
3. Adjust the Lumbar Height
The default setting has the lumbar support unit set to its highest level. DXRacer rates this chair for sizes 5’7″ to 6’6″. I’m 5’9″ and found it a shade too high.
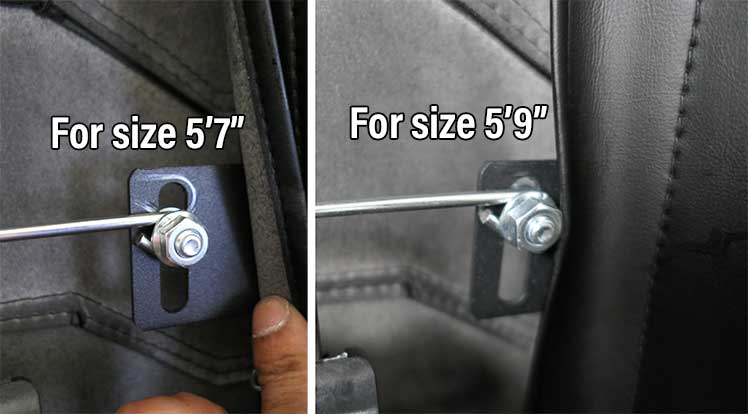
A small height adjustment makes a big difference. My first setting placed the lumbar too low, closer to my tailbone. A re-adjustment around 2 millimeters lower than the default fit perfectly!
Once the height is adjusted on all four sides, tighten the bolts, slap on the foam cover, and test the support.
Conclusion
The DXRacer Master is a new premium gaming chair for power users. This assembly guide shows various aspects of the high-quality build.
This model stands out in two ways. First, it’s modular. That means you can attach a footrest, laptop holder, or cup holder. It’s also the only gaming chair with an integrated lumbar that is height-adjustable.
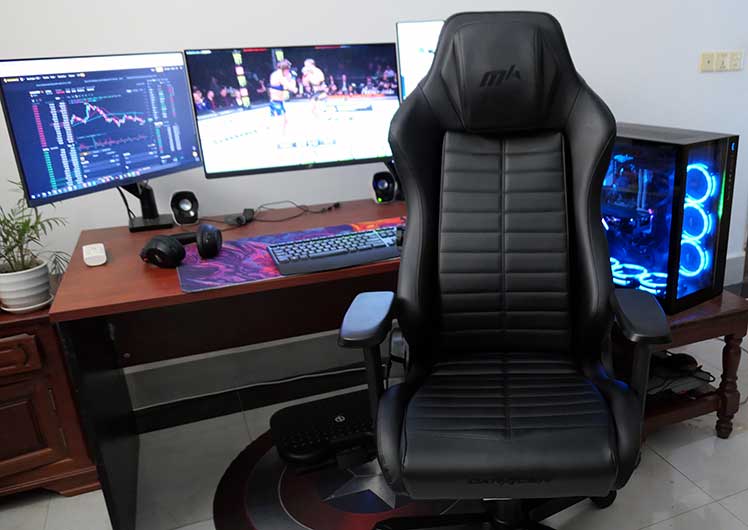
DXRacer doesn’t promote that feature, but it exists. If premium back support is a priority, tailoring the height of the Master Chair’s lumbar unit is well worth doing.
The DXRacer Master is also available on Amazon for Price not available. At present, extendable modules are only .


